Project goals
endre has bought a LED display made by Mediotext a while ago from Vatera, with dried out capacitors. The project aims to replace the original microcontroller with Arduino and to develop an Arduino library so that one can make use of the display for various projects.The display
The display itself is built up with 96x7 5mm red LED pixels made by german firm Mediotext, and has had a 6502 microcontroller that has been replaced with Arduino lately. Award goes to MrT for his excellent reverse engineering work. Interface 
The display is equipped with a DB-9 connector on the top, having the folling pinout:- SHR_CLK
- SHR_DAT
- RESERVED
- +5v
- GND
- ROW_ID_0
- ROW_ID_1
- ROW_ID_2
- BUZZER
Operation
The X and Y axis "addressing" are completely independent and driving them has completely different approach.- X axis: a LED is "addressable" by filling the shift registers with loading all of the 96 LEDs levels (Arduino
shiftOut()function) corresponding to a specific row. - Y axis: a row can be selected by pulling the ROW_ID_x levels down. Obviously only one row can be selected at a time.
- Blanking: The display can be blanked (for example during the shiftOut update period) with all the lines pulled down.
Arduino code
Arduino source code is available in the https://github.com/hsbp/arduino2mediotext repository. The master branch has code that scrolls a hardcoded text.Remote control branch
The remote-control branch makes the Arduino a dumb framebuffer that can be controlled over a serial connection. Currently, the protocol offers only one command, block update and a speed of 19.200 bps.Block update command
The block update command deals with 8-pixel horizontal blocks, resulting in 12 × 7 such blocks. The header bits look like the following:| 11AAABBB | CCCCDDDD |
- AAA is the first row to be updated (0-6)
- BBB is the first row not to be updated (1-7)
- CCCC is the first 8-pixel horizontal block to be updated (0-11)
- DDDD is the first 8-pixel horizontal block not to be updated (1-12)
Arduino accelerated graphics commands (beta)
The virtual width of the display should be increased to 256 pixels, with two offsets representing the 96-pixel wide window used for the block update command above (ops offset) and the one used for driving the display (display offset). By default, both are zero, resulting in backwards compatibility.These offsets can be set with the following commands. Since the ops offset is kept at 8-pixel (block) boundaries, 5 bits are enough, these are marked with X below.
| 001XXXXX |
For smooth scrolling, the display offset can take any value between 0-255, thus it's sent on its own after the following bits.
| 00000010 |
To get Arduino accelerated smooth scrolling, automated incrementing of the display offset can be enabled and its speed can be set using the following command. XXXXXX denotes a 6-bit value of the speed, all zeroes mean no scrolling, which is the default.
| 01XXXXXX |
For dynamic scrollers, querying the display offset can be necessary, this can be done using the following command.
| 00000011 |
This will result in the Arduino sending back the current value of the display offset in a single byte.
Last but not least, commands could be saved in the EEPROM for autonomous (PC-less) operations. The header consists of the command (100000) and 10 bytes of length.
| 100000XX | XXXXXXXX |
This is followed by the number of bytes denoted by the length field, so the length field doesn't take the header into account, only the payload. These are then written into the EEPROM with the header included, so that the Arduino will know how many bytes in the EEPROM are valid. Because EEPROM writes are slow and the Arduino serial receive buffer is limited, the second header byte (the low 8 bits of the payload length) and all the payload bytes are echoed back, and the client should wait for this acknowledgment before sending the next byte.
After reset, the Arduino waits for 5 seconds for serial commands, and if none arrive, it performs PC-less operation in which it reads the commands from the EEPROM and execute them just as if they would've been sent over the serial port. This will probably consist of one or more block update commands separated by set ops offset commands, with a set scroll speed command at the end.
This still leaves space for future commands:
| 0001XXXX |
| 101XXXXX |
Python API
To make things easier, a simple Python API is implemented by the Remote class, having the following methods. Pixels are expressed with tuples having two members, X and Y.- __init__(serial_class=Serial) the only optional parameter can be used for testing, otherwise the
/dev/ttyUSB0(first USB-Serial converter on Linux) will be used using pySerial - set_pixel(pixel, value) sets the pixel specified by the first parameter to value (True means lit, False means dark)
- get_pixel(pixel) returns the current state of the pixel specified by the only parameter
- flush_pixels() if any pixels has changed since the last flush, it updates the affected region
Note: for performance reason, set_pixel calls doesn't take effect until the next call to flush_pixels, but get_pixel already returns the new value
If you need low-level access, the
framebuf attribute stores the framebuffer as a flat list of boolean values, from left to right then top to bottom. Reading it should not cause any problems, but writing it is discouraged as the next call to flush_pixels will not know which pixels you changed.Examples
- test cases, providing a 100% code coverage of the Python Remote class
- spectrum visualization using pyaudio and numpy (YouTube video)
- hackerspace uptime using HackSense data (YouTube video)
- temperature display of zoldfal using SpaceAPI data
- game of life, displaying Conway's classic on a sphere (top-bottom and left-right edge pixels are neighbours)
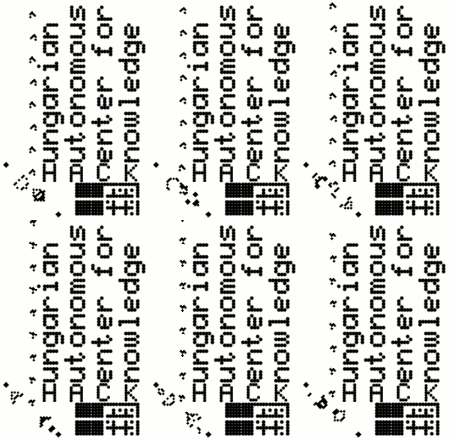
- scroller, capable of displaying any monochrome PNG, example:
Font ideas
- http://damieng.com/blog/2011/02/20/typography-in-8-bits-system-fonts
- http://damieng.com/blog/2011/03/27/typography-in-16-bits-system-fonts
